|
3/14/04
The Pipe
Project started around the middle of last month when I was
in a teacher supply store. I found a marble game there consisting
of a number of plastic pipes that could be fitted together
to construct a marble machine. I had made marble machines
as a child using the tubes that are left over from paper towels
and toilet paper. The idea was to tape them together in various
configurations and then drop a marble in one end and wait
for it to come out the other end. The game that was for sale
cost about $60. It occured to me that you could buy a whole
lot of PVC for $60.
I immediately
went to Home Depo and began to get smart about PVC. A 10'
length of 1/2" pipe costs just a bit less than a dollar,
and the fittings are sold for various prices ranging from
20 to 90 cents. I bought eight pipes and a couple of bags
each of elbow, T, and coupling fittings. The bill for the
materials was less than $20, and I also bought a pipe cutter
for $10.
When I
got back to work. I cut the pipe into 2", 4", 6",12",
and 24" lengths. I assembled some simple structures and
found the pipe inviting to play with. It was easy to fit together
and disassemble.
When the
students arrived, I let them play with the pipes on their
own to see what they would make of it. They enjoyed having
something new to do. I gave them the task of constructing
a tower that could stand without falling over and reach all
the way to the ceiling. Working together, they were eventually
able to construct a structure that met my simple specifications.
In the
days that followed, I tried out a number of different projects
to see what would result. I had one student construct a self-standing
arch that was big enough for the student to walk through.
After the student completed the construction, I had the student
deconstruct and sort the parts that had been used, then I
had the student determine the cost of the structure using
a price list I had made that listed a price for each part.
Because the pipe lengths were not marked, the student had
to figure out the sizes of the different lengths of pipe by
measuring them against each other. Finally I had the student
remake the arch using fewer pieces to see how much money could
be saved while still meeting the specifications.
I had
a group of students construct a four-sided structure that
one of them could stand inside without touching any of the
pipes. After they had built their structure, I had them each
figure out the cost of the materials they had used. In retrospect,
it would have been more useful if I had had them check their
answers against each other's calculations first before I checked
them. I used the opportunity to have one of the older students
see how Excel could be used to do the calculations.
I also
tried out a plumbing project that involved the use of little
wooden houses.
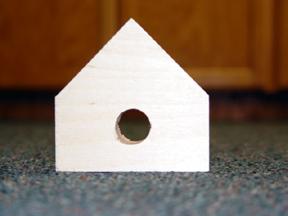
The students
were to provide water and sewage service to as many houses
as possible making sure not to get the pipes going into the
houses confused with the pipes that were going out of the
houses. Two different pairs of students tried this one with
two very different results.
I went
back to Home Depo to see if I could find a fitting that would
allow for free movement so a structure could be made that
could either swing or spin. I found a solution in a 3/4"
t-joint with a 1/2" adaptor that connected to the t-joint
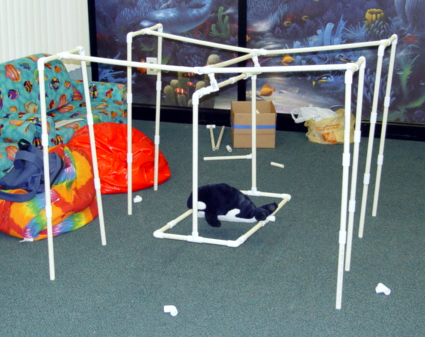
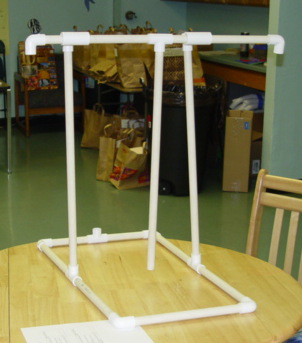
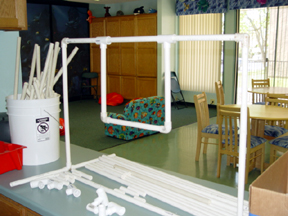
at a 90 degree angle. I gave a couple of students the task
of making a swing for a stuffed killer whale. The only specification
was that the structure had to swing the whale without falling
over. This was their result:
I am currently
working on formal projects that provide progressive levels
of reward for constructing projects that have increasingly
sophisticated specifications.
3/20/04
Yesterday
I tried out several pipe construction projects that I had
written up earlier in the week. Each Pipe Project has a junior,
intermediate, and senior level with increasingly sophisticated
requirements. I had the students try out some of the junior-level
projects to see if they could create a result that met the
specifications without any additional directions. The session
was instructive. The fact that even the junior level project
specifications require students to solve a problem that could
have a number of possible solutions was a source of anxiety.
One student exclaimed, "I am as dumb as a stump when
I have to do stuff like this." After a few false starts
and lots of encouragement on a Pipe Project that called for
making a four-sided construction that was four feet high,
this was the result:

It was
interesting to watch this student go about solving the problem
because the thought process that was going on was made explicit
as the pipes were joined together. Something that seemed very
obvious proved to be a solution that had to be discovered
by hard thinking. After the student had constructed the bottom
and put together the pipes so that the construction was four
feet tall, the problem of how to have them all connect at
the top was not self-evident. At the end, the student finally
figured it out.
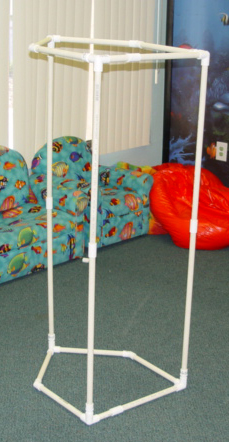
Another
student was able to construct a 4-foot tower that had a pentagon
at each end, but it took quite an effort to figure out how
to construct an pentagon with the available materials. This
was the result:
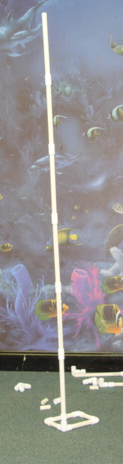
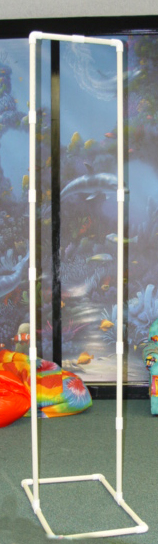
Another
project was to construct a 6-foot tower that could stand by
itself. Here are a couple of solutions that the students achieved:
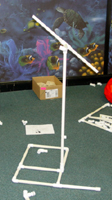
I gave
one student the task of making a construction that had a part
that could swing freely. This proved to be quite a challenge,
but success was eventually achieved:
I am planning
more projects that benefit from what I have learned watching
the students solve the problems that I have written up so
far.
4/2/04
Had a
conversation with Sean who is in charge of landscaping at
the EAH properties in the South Bay. He told me that he had
a whole lot of spare joints and could get me more 1/2"
PVC pipe at wholesale. I put in my order and today he dropped
this off in my office:
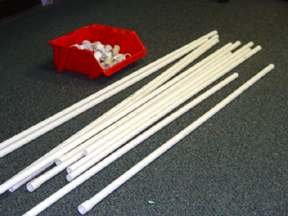
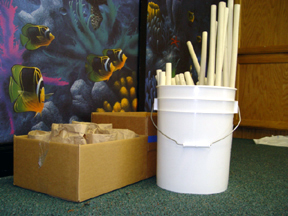
I got
busy cutting up the pipe into 36" lengths. I cut the
pieces that remained into the lengths that I had cut earlier.
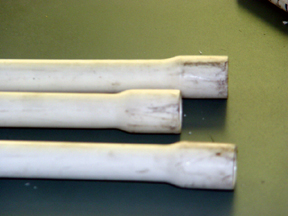
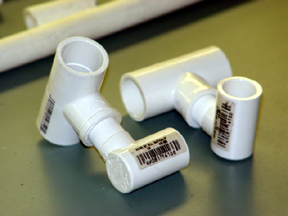
Several
of the pipes had enlarged ends so that they could be joined
together without using a coupling joint.
One happy
surprise was a 3/4" T joint that had a 1/2" side.
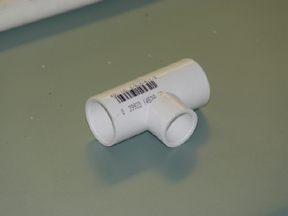
The only
way I could find a joint that would allow the 1/2" pipe
freedom of movement at Home Depot was this:
Not an
elegant solution, but one that worked nonetheless. The 3/4"
joint with the 1/2" side makes it possible to make a
construction with a part that can swing:
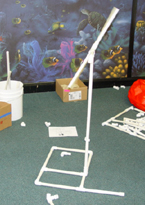
Today,
one of the students tried to complete the "Windmill"
project. The construction had to have a part that could spin
freely. This was the result:
4/13/04
Had a
working holiday last Thursday and Friday so that I could put
in some quality time on getting caught up on what I have been
doing with the learning projects. Here are the handouts that
give the specifications for the Pipe Projects that I have
written up so far. More are in the works.
Pipe
Parts
Four-Sided
Skyscraper
Pentagon
Skyscraper
Plumbing
Space
Station
Swing
Tall
Tower
Windmill
5/25/04
One of
problems with the pipe project has been having the pipes out
in the open. It was just too much of a temptation for the
students. They would all want to start horsing around with
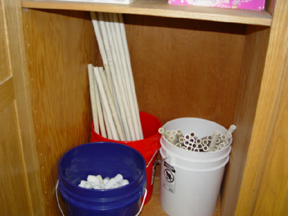
the pipes rather than do a project. One thing I learned from
running a summer camp is that it is far better to place a
clear physical restriction on something rather than try to
enforce a rule about how something is to be used. I went to
the TAP Plastic store and got a red and blue bucket to store
the pipe parts and then cleared a space in the built in cabinet
in the room to put them out of sight.
Now if
you are going to do a project, you have to get the buckets
out of the closet. Simple things like this really make a big
difference in how things are done. |